[ZenML] Build ML Pipeline with remote stack and GCS Artifact Store
In this blog post, we will walk through the process of setting up a ZenML pipeline using a remote stack and Google Cloud Storage (GCS) as the artifact store.
Introduction
ZenML is an open-source framework that simplifies the process of building and managing machine learning (ML) pipelines. It provides a unified interface for orchestrating various components of the ML workflow, making it easier to develop, deploy, and maintain ML models.
In this blog post, we will walk through the process of setting up a ZenML pipeline using a remote stack and Google Cloud Storage (GCS) as the artifact store. This setup allows for efficient data management and seamless integration with cloud services.
Prerequisites
Remote ZenML server access
Google Cloud account with GCS access
ZenML CLI installed
Basic understanding of Python and ZenML
Step 1: Setting Up the Environment
Before we start, ensure you have the ZenML CLI installed and configured. Would suggest using a virtual environment or uv env to manage dependencies.
pip install zenmlStep 2: Configure ZenML
To connect to the remote ZenML server, you need to set up your environment variables. This includes the ZenML store URL and the API key.
`.env`
ZENML_STORE_URL=https://YOUR_ZENML_SERVER

ZENML_STORE_API_KEY=YOUR_API_KEY
Step 3: Check ZenML Status
After setting up the environment variables, check the ZenML status to ensure you are connected to the remote server.
zenml statusThis command will display the current status of your ZenML client, including the active stack and user information.
-----ZenML Client Status-----

Connected to a remote ZenML server: `https://xxx`

Dashboard: https://YOUR_ZENML_SERVER

API: https://YOUR_ZENML_SERVER

Server status: 'available'

Server authentication: API key

The active user is: 'sa-jimmyliao-dev'

The active stack is: 'zenml-remote-stack-gcp' (repository)

Active repository root: xxx

Using configuration from: 'xxx'

Local store files are located at: 'xxx'
Step 4: Check Service Connector
To ensure that the service connector is set up correctly, run the following command:
zenml service-connector listThis command will list all the service connectors available in your ZenML environment. Look for the `gcs-zenml` connector, which indicates that GCS is set up as an artifact store.
┏━━━━━━━━┯━━━━━━━━━━━━━━━━━━━━━┯━━━━━━━━━━━━━━━━━━━━━┯━━━━━━━━━━━┯━━━━━━━━━━━━━━━━━━━━┯━━━━━━━━━━━━━━━┯━━━━━━━━━━━━━━━━━━┯━━━━━━━━━━━━┯━━━━━━━━┓

┃ ACTIVE │ NAME │ ID │ TYPE │ RESOURCE TYPES │ RESOURCE NAME │ OWNER │ EXPIRES IN │ LABELS ┃

┠────────┼─────────────────────┼─────────────────────┼───────────┼────────────────────┼───────────────┼──────────────────┼────────────┼────────┨

┃ │ **gcs-zenml** │ 66766d6a-6cbb-4780- │ 🔵 gcp │ 📦 gcs-bucket │ <multiple> │ jimmyliao │ │ ┃

┃ │ │ 9861-94c268cfa79f │ │ │ │ │ │ ┃

┠────────┼─────────────────────┼─────────────────────┼───────────┼────────────────────┼───────────────┼──────────────────┼────────────┼────────┨

┃ 👉 │ **zenml-remote-stack-** │ 0a154796-920a-4cf7- │ 🔵 gcp │ 🔵 gcp-generic │ <multiple> │ jimmyliao │ │ ┃

┗━━━━━━━━┷━━━━━━━━━━━━━━━━━━━━━┷━━━━━━━━━━━━━━━━━━━━━┷━━━━━━━━━━━┷━━━━━━━━━━━━━━━━━━━━┷━━━━━━━━━━━━━━━┷━━━━━━━━━━━━━━━━━━┷━━━━━━━━━━━━┷━━━━━━━━┛
Step 5: Check Artifact Store
To verify the artifact store configuration, run the following command:
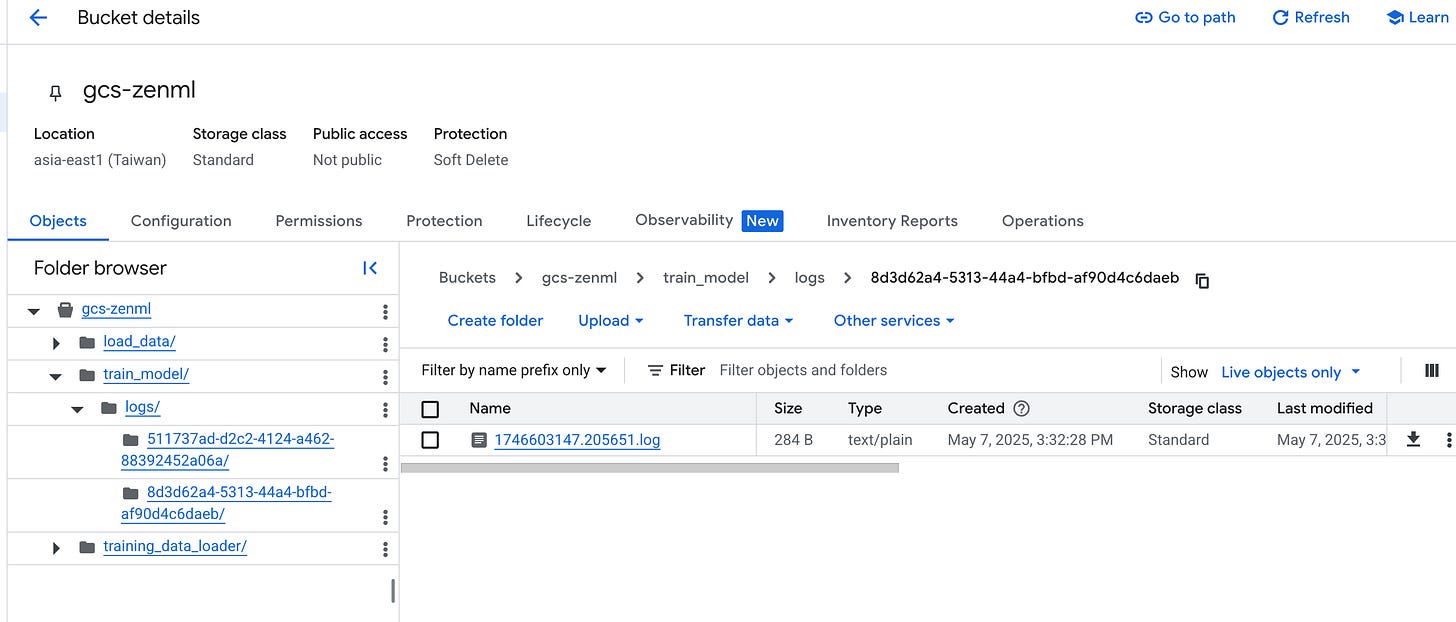
zenml artifact-store listThis command will list all the artifact stores available in your ZenML environment. Look for the `gcs-zenfile` artifact store, which indicates that GCS is set up as an artifact store.
┏━━━━━━━━┯━━━━━━━━━━━━━━━━━━━━━━━━┯━━━━━━━━━━━━━━━━━━━━━━━━━━━━━━━━━━━━━━┯━━━━━━━━┯━━━━━━━━━━━━━━━━━━┓

┃ ACTIVE │ NAME │ COMPONENT ID │ FLAVOR │ OWNER ┃

┠────────┼────────────────────────┼──────────────────────────────────────┼────────┼──────────────────┨

┃ 👉 │ zenml-remote-stack-gcp │ e92917a5-0f5c-4eb7-b61a-2507ea96f885 │ gcp │ jimmyliao ┃

┠────────┼────────────────────────┼──────────────────────────────────────┼────────┼──────────────────┨

┃ │ default │ 8125a37a-1f7e-4fc6-8b34-09c8acbf39d2 │ local │ - ┃

┗━━━━━━━━┷━━━━━━━━━━━━━━━━━━━━━━━━┷━━━━━━━━━━━━━━━━━━━━━━━━━━━━━━━━━━━━━━┷━━━━━━━━┷━━━━━━━━━━━━━━━━━━┛
Step 6: Check Current Active Stack
To check the current active stack, run the following command:
zenml stack listStep 7: Change to Use `gcs-zenfile` Stack
To change the active stack to `gcs-zenfile`, run the following command:
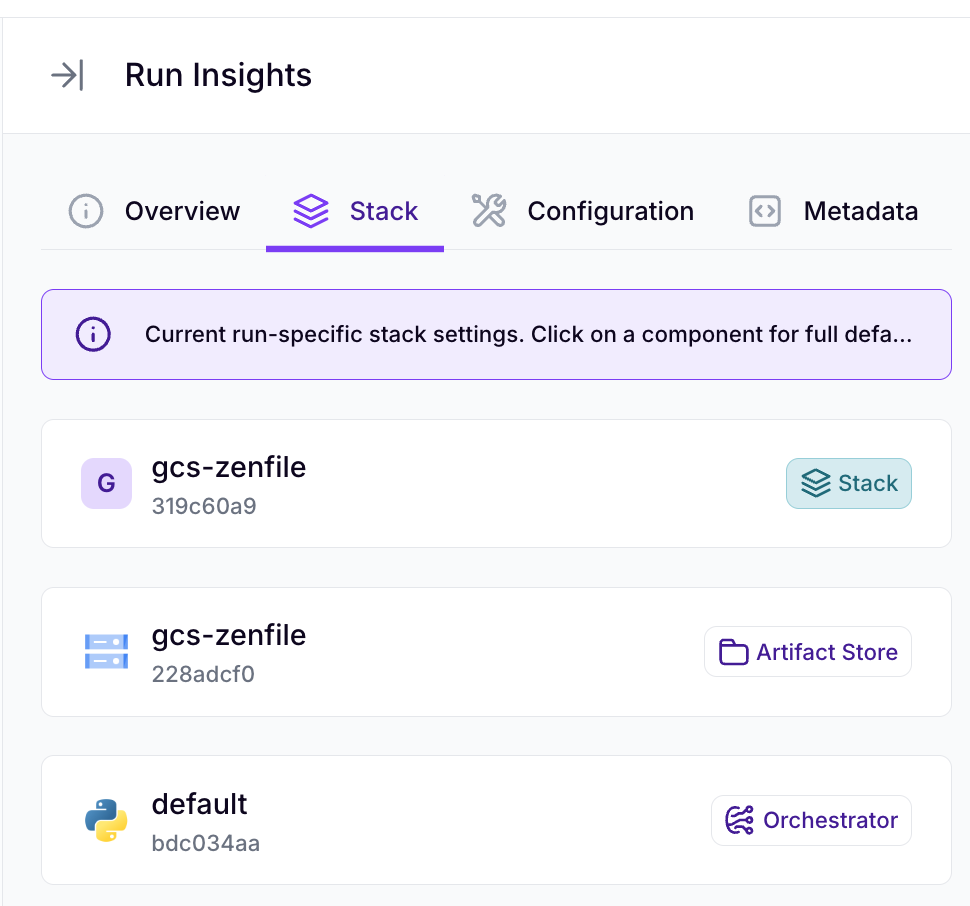
zenml stack set gcs-zenfileThis command will set the active stack to `gcs-zenfile`, which is configured to use GCS as the artifact store.
Step 8: Verify the Active Stack
To verify the active stack, run the following command:
zenml stack getThis command will display the current active stack and its components.
The repository active stack is: 'gcs-zenfile'Step 9: Create a Simple Pipeline
Now that we have set up the environment and configured the stack, let's create a simple ZenML pipeline. Create a new Python file named `01_starter_simple.py` and add the following code:
from zenml import pipeline, step

from zenml import pipeline, step

import time

@step

def load_data() -> dict:

"""Simulates loading of training data and labels."""

 training_data = [[1, 2], [3, 4], [5, 6]]

 labels = [0, 1, 0]

return {'features': training_data, 'labels': labels}

@step

def train_model(data: dict) -> None:

"""

 A mock 'training' process that also demonstrates using the input data.

 In a real-world scenario, this would be replaced with actual model fitting logic.

 """

# custom for each run, like the model name, run_id from current timestamp

 run_id = time.strftime("%Y%m%d-%H%M%S")

 model_name = f"model_{run_id}"

print(f"Training model: {model_name}")

 total_features = sum(map(sum, data['features']))

 total_labels = sum(data['labels'])

print(f"Trained model using {len(data['features'])} data points. "

f"Feature sum is {total_features}, label sum is {total_labels}")

@pipeline

def simple_ml_pipeline():

"""Define a pipeline that connects the steps."""

 dataset = load_data()

 train_model(dataset)

if __name__ == "__main__":

 run = simple_ml_pipeline()
Step 10: Trigger the Pipeline
To trigger the pipeline, run the following command:
python 01_starter_simple.pyThis command will execute the pipeline and display the output in the console.
Initiating a new run for the pipeline: simple_ml_pipeline.

Using user: sa-jimmyliao-dev

Using stack: gcs-zenfile

artifact_store: gcs-zenfile

orchestrator: default

Dashboard URL for Pipeline Run: https://xxx/runs/4817810f-83c6-4681-a6e5-3110264b3352

Using cached version of step load_data.

Step train_model has started.

[train_model] Training model: model_20250507-153226

[train_model] Trained model using 3 data points. Feature sum is 21, label sum is 1

Step train_model has finished in 4.893s.

Pipeline run has finished in 12.617s.
Step 11: Check the Dashboard
After the pipeline run is complete, you can check the ZenML dashboard for detailed information about the run. The dashboard provides insights into the pipeline execution, including step statuses and outputs.


